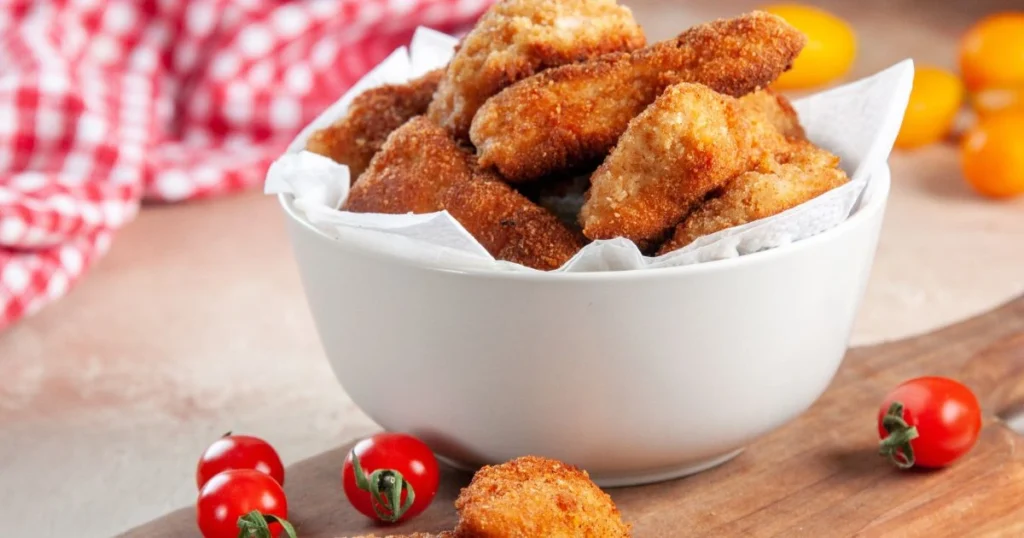
The Best Baked Chicken Strips Recipe for Easy
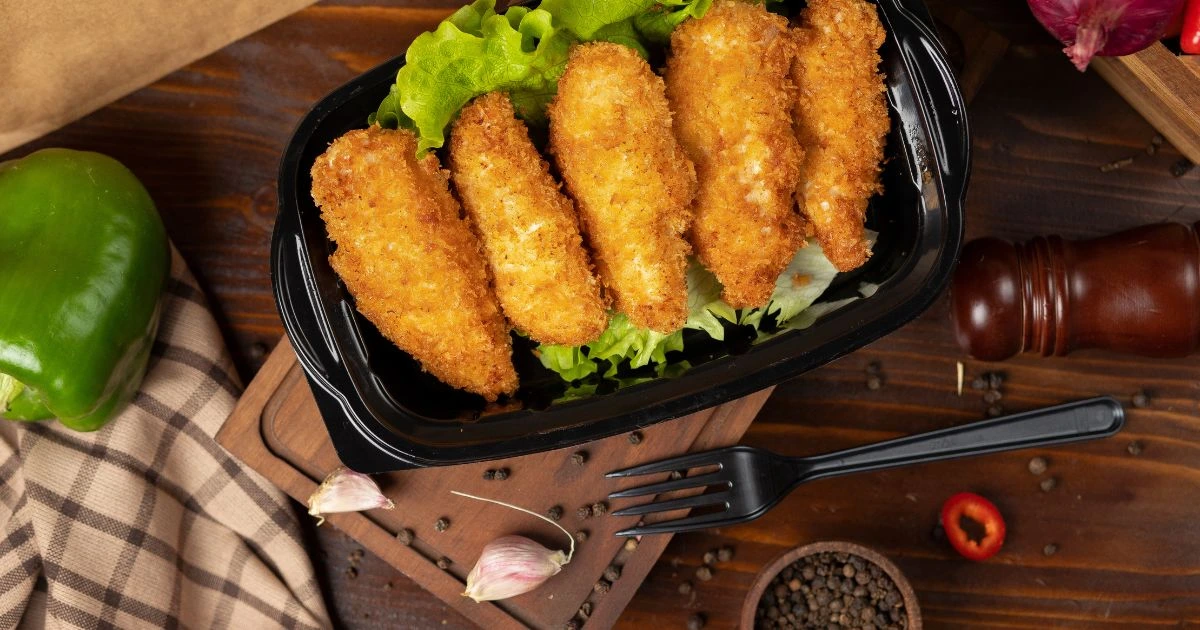
Every busy parent faces the challenge of making a quick, tasty meal that kids will enjoy. Our baked chicken strips recipe is the perfect answer. It turns dinner into a fun event. These golden, crispy chicken strips are more than just a meal – they’re a game-changer for weeknight dinners and family gatherings.
Forget greasy, deep-fried options. This healthy chicken strip recipe offers great taste with little effort. You’ll make restaurant-quality chicken strips in your kitchen, full of crunch and nutrition. Everyone at the table will be happy.
These baked chicken strips are great for picky eaters or a simple meal prep option. They’re your new favorite dinner solution. With just 30 minutes from start to finish, you’ll have a dish that’s tasty, nutritious, and convenient.
Table of Contents
Why These Baked Chicken Strips Are Better Than Fried ?
Homemade chicken breast strips recipes are a big change from fried ones. Baking your chicken strips is not just a cooking method. It’s a healthier option that still delivers great taste and texture.
Health Benefits of Baking vs. Frying
When you make chicken strips at home, you control what goes into them. Baking cuts down on oil, which means fewer calories and unhealthy fats than fried chicken. Your body will appreciate this healthier cooking choice.
- Up to 50% less fat than deep-fried alternatives
- Preserves more natural nutrients
- Reduces cholesterol intake
Time and Cleanup Advantages
Baking chicken strips makes cooking easier. No need to stand over a hot fryer or clean greasy pans. Just prepare, bake, and enjoy easy cleanup.
| Cooking Method | Prep Time | Cleanup Time |
|---|---|---|
| Deep Frying | 30-45 minutes | 20-30 minutes |
| Oven Baking | 10-15 minutes | 5-10 minutes |
Cost-Effective Meal Solution
Homemade chicken strips are not just healthier, they’re also cheaper. Avoid expensive takeout and restaurant meals by making your own crispy chicken strips.
Cooking at home isn’t just about saving money—it’s about creating memories and nutritious meals your family will love.
Essential Ingredients for Perfect Chicken Strips Recipe
To make tasty chicken strips, you need the right ingredients. Start with top-notch chicken tenderloins. They are the base of a delicious meal. Chicken strips need special ingredients for that crispy outside.
Here are the main ingredients you’ll need:
- Chicken Tenderloins: Pick fresh, high-quality chicken for great taste
- Large Eggs: They help the coating stick to the chicken
- Panko Breadcrumbs: Give an extra crispy texture
- Seasonings:
- Garlic Powder
- Onion Powder
- Paprika
- Salt
- Black Pepper
- Cooking Spray: It helps get a golden-brown crispiness
Each ingredient is important in your chicken strips recipe. Eggs and breadcrumbs stick to the chicken. Panko adds a crunchy texture. Garlic and onion powders give a rich flavor.
Pro tip: For those with dietary restrictions, you can easily substitute ingredients to suit your needs without compromising taste!
By choosing and mixing these ingredients well, you can turn simple chicken into a meal that’s a hit with everyone.
Kitchen Tools and Equipment You’ll Need
Preparing delicious chicken strips needs the right kitchen tools. Whether you’re making a split lamb breast plate recipe or classic chicken strips, the right tools make cooking easier and more fun.
Professional chefs and home cooks know quality kitchen tools change your cooking. The right equipment ensures consistent results and makes cooking chicken strips or lamb breast plates easy.
Essential Baking Sheets and Accessories
Choosing the right baking sheet is key for perfectly cooked chicken strips. Here are the must-haves:
- Heavy-duty aluminum baking sheet
- Non-stick silicone baking mat
- Aluminum foil (for easy cleanup)
- Cooking spray
Measuring and Mixing Equipment
Precision is crucial in any recipe, including lamb breast plate preparation. Here are the essential tools:
- Measuring cups and spoons
- Large mixing bowls
- Shallow dishes for coating
- Large zip-top freezer bags
Temperature Control Tools
Accurate temperature monitoring is key for perfectly cooked chicken every time:
| Tool | Purpose |
|---|---|
| Oven Thermometer | Ensures accurate oven temperature |
| Digital Meat Thermometer | Checks internal chicken temperature |
| Kitchen Timer | Prevents overcooking |
Pro tip: Investing in quality kitchen tools can elevate your cooking skills for both split lamb breast plate recipes and chicken strip preparations.
Step-by-Step Preparation Guide
Making the perfect chicken strips recipe needs careful prep and detail. This method focuses on crispy, tasty chicken strips. They will surely please your taste buds.
- Prepare Your Workspace: Get all ingredients and tools ready before starting. This makes cooking easier.
- Preheat the Oven: Set your oven to 400°F (204°C). The right temperature is key for a crispy outside and juicy inside.
- Create Coating Mixture: Mix breadcrumbs, seasonings, and spices in a shallow dish. Panko breadcrumbs add extra crunch.
Your coating mixture is the secret to great chicken strips. Make sure to mix dry ingredients well for even flavor.
- Egg Wash Preparation: Whisk eggs in a separate bowl. This helps the coating stick to the chicken.
- Coat the Chicken: Dip each chicken strip in the egg wash, then in the breadcrumb mixture. Press gently for full coverage.
- Arrange on Baking Sheet: Place coated chicken strips on a lined baking sheet. Make sure they have space for even cooking.
| Preparation Step | Key Tip |
|---|---|
| Coating | Press breadcrumbs firmly for maximum crispiness |
| Spacing | Avoid overcrowding to ensure crisp edges |
| Seasoning | Experiment with different spice blends |
Pro tip: Lightly spray the chicken strips with cooking spray before baking. This extra step helps achieve a golden, crispy exterior that rivals any deep-fried version.
- Bake to Perfection: Cook for 15-20 minutes, flipping halfway through. Internal temperature should reach 165°F (74°C).
By following these steps, you’ll make delicious chicken strips. They are healthier than fried options and full of flavor.
Secret Tips for Extra Crispy Coating
Getting that perfect crispy coating on chicken strips is an art. It’s more than just breading. Whether you’re making a kfc crispy chicken strips recipe or just want to improve your cooking, these tips will make your chicken amazing.
Creating the ultimate crispy exterior is not just about breadcrumbs. Professional chefs use secrets to make their chicken strips stand out. They know what makes restaurant-quality chicken special.
Panko Breadcrumb Mastery
Panko breadcrumbs are key for incredible crunch. They’re different from regular breadcrumbs because they make a lighter, more delicate crispy layer. Here’s how to use them best:
- Crush panko breadcrumbs slightly for better adhesion
- Mix panko with dried herbs for added flavor
- Double-coat your chicken for extra crispiness
Seasoning Combinations That Wow
Your seasoning blend is crucial for chicken strips. Try these flavor-packed combinations inspired by global cuisine and cooking methods like lamb breast:
- Spicy Cajun Blend: Paprika, cayenne, garlic powder
- Mediterranean Mix: Dried oregano, thyme, lemon zest
- Classic Southern: Buttermilk powder, black pepper, salt
Temperature Control Secrets
Temperature is key for that perfect crisp. Preheat your baking sheet and use a light cooking spray for better texture. A pro tip: spray each chicken tender twice for an extra crispy exterior.
Pro Chef Tip: The key to crispy chicken is not just ingredients, but technique!
Cooking Time and Temperature Guidelines

Getting your chicken strips just right means paying attention to cooking time and temperature. This ensures they come out crispy on the outside and juicy on the inside. Every time you bake, you’ll get perfect results.
Start by preheating your oven to 450°F (230°C). This high heat helps create a golden-brown coating. It’s just like the crispy coating on fried chicken strips.
| Cooking Stage | Temperature | Time |
|---|---|---|
| Initial Baking | 450°F | 7 minutes |
| Flip Strips | 450°F | 7 minutes |
| Final Broil | Broil | 1-2 minutes |
Chicken strips need quick, high-heat cooking to get crispy. This is different from lamb breast plate dishes, which cook slower.
- Always use a meat thermometer to check internal temperature
- Chicken should reach 165°F for safe consumption
- Let strips rest for 3-5 minutes after cooking
Pro tip: Thickness matters! Thicker chicken strips might need slight adjustments in cooking time. Watch closely and adjust as needed.
Best Dipping Sauces and Accompaniments
Make your chicken breast strips recipes even better with tasty dipping sauces. These sauces can turn a simple meal into a special experience. The right sauce can make your chicken strips unforgettable.
Dipping sauces are key to making your chicken strips irresistible. They’re perfect for a quick family dinner or a casual get-together. These sauces will take your dish to the next level.
Homemade Ranch Dressing Recipe
Make a creamy, zesty ranch dressing that’s perfect with chicken strips. This sauce is great for chicken and also goes well with slow-cooked lamb.
- 1/2 cup buttermilk
- 1/4 cup mayonnaise
- 1/4 cup sour cream
- 1 tablespoon fresh lemon juice
- Chopped fresh herbs (dill, chives, parsley)
- Garlic powder, salt, and pepper to taste
Classic and Creative Sauce Options
Try these delicious dipping choices to add more flavor:
- Honey Mustard – Sweet and tangy
- Spicy Sriracha Mayo
- Barbecue Sauce
- Garlic Aioli
- Chipotle Cream Sauce
Pro tip: Mix different sauces to create new flavors. Your chicken strips will always be exciting!
Storage and Reheating Instructions
Learning how to store and reheat your chicken strips can make your meals better all week. Your homemade chicken strips can stay fresh and crispy with the right storage.
For the best taste, keep your chicken strips in an airtight container in the fridge. They’ll stay good for up to 4 days if sealed well. This method is similar to how you prepare a split lamb breast plate recipe in the oven.
Best Storage Practices
- Use glass or plastic containers with tight-fitting lids
- Allow chicken strips to cool completely before storing
- Place a paper towel in the container to absorb excess moisture
- Keep refrigerated at 40°F or below
Reheating Methods
Reheating chicken strips needs careful attention to keep them crispy. Here are three good ways to do it:
- Oven Method: Preheat to 375°F, place strips on a baking sheet, and heat for 10-12 minutes
- Air Fryer Method: Cook at 370°F for 3-4 minutes until heated through
- Microwave Method: Use sparingly to prevent soggy texture, heat in 30-second intervals
Pro tip: Don’t freeze your chicken strips. Freezing can ruin their texture and crispiness. Fresh is always best for enjoying your homemade chicken strips recipe!
Conclusion
Your baked chicken strips recipe is more than just a meal. It’s a journey that mixes health, taste, and ease. By baking instead of frying, you’ve chosen a method that’s tasty and good for you. This skill can also help you with other recipes.
Imagine making a smoked split lamb breast plate recipe that wows everyone. The skills you’ve learned can be used with different foods. This makes you more confident in the kitchen.
Cooking is all about trying new things and having fun. Feel free to try different seasonings, breadcrumbs, and sauces. Each time you make chicken strips, you get better at it. Your kitchen is where you create tasty memories.
This baked chicken strips recipe is the perfect way to begin cooking. Share your dishes with loved ones and watch your skills grow. Every meal is a chance to learn and enjoy making food at home.